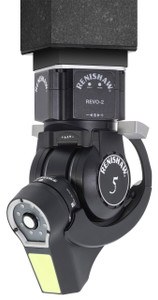
Renishaw REVO RFP Fringe Probe - RFP1
Brand: Renishaw- SKU:
- RFP1
- ID:
- 354301
| Call For Price Enable | yes |
Renishaw REVO RFP Fringe Probe - RFP1
RFP Fringe Probe for the REVO® System
Highly accurate structured light measurement probe for REVO-2
The REVO RFP probe makes structured light inspection an integral part of your CMM measurement procedure.
The REVO fringe probe (RFP1) is a non-contact structured light sensor for the REVO® system offering highly accurate measurement of surface topology on an infinite positioning, 5-axis CMM platform.
RFP1 increases the multi-sensor capability of the REVO system, which now offers five interchangeable probe families, each specifically designed to maximise the advantages of 5-axis motion and infinite positioning: Interchangeable Tactile Scanning, Touch-trigger, Surface Finish, Non-contact Structured Light, and Vision Probes.
The RFP1 probe is designed for inspection of free-form surfaces and complex geometry, rapidly delivering patches of surface data with a high point density. The probe projects a fringe pattern onto the part surface, capturing variations in the fringe pattern with the camera to build a point cloud of 3D surface data.
Automatic exposure controls compensate for different surface materials, colours and textures, ensuring optimal data results without the need for matt coatings.
Unlike other non-contact structured light systems, the RFP1 fringe probe does not require reference markers to stitch together data from different patches – this is done automatically by the REVO system.
Two new software tools provide easy-to-use inspection planning and digitising. The RFP inspection planner is a tool for path planning and generating DMIS part programs from CAD, whilst the RFP digitiser collects data from parts without CAD models as part of a reverse engineering process.
How the RFP Fringe Probe Works:
- RFP provides high density data at a high capture rate to deliver highly accurate measurement of surface topology.
- The probe projects a fringe pattern onto the part surface and the probe's camera captures the variation in fringe pattern to build a high-density point cloud of 3D surface data. The data cloud is then evaluated by the 3D metrology software to deliver the inspection results.
- The RFP probe is powered by REVO 5-axis measurement technology and provides highly accurate measurement on an infinite positioning CMM platform. Data from all REVO sensors is automatically referenced to a common datum and combined with data from all other REVO-2 sensors maximises part inspection capability on one CMM.
Features and Benefits:
- Unlike other non‑contact structured light systems, the RFP fringe probe does not require reference markers to stitch together data from different areas, as this is done automatically by the REVO system.
- Automatic exposure compensation ensures optimal data results for different materials, surface colours and textures without the need for matt coatings.
- Two easy-to-use software tools provide inspection planning and digitising capability:
- RFP inspection planner is a tool for path planning and generating DMIS part programs from CAD.
- RFP digitiser software collects data from parts without CAD models as part of a reverse engineering process.
Click to Watch a Video of the Introduction to the RFP Probe
Click to Watch a Video of Fast Inspection of Combustion Chamber Volume with the RFP Probe
Specifications:
| Field of view | 50 mm x 50 mm |
| Depth of field | 20 mm |
| Stand-off | 160 mm |
| Rotational capability | A-axis (from REVO-2): +120° / -5° |
| B-axis (from REVO-2): Infinite positioning | |
| XY point density (resolution) | 65 μm |
| Probe repeatability (plane) | 4 μm (2σ) |
| Probe accuracy (position error of a plane) | 9 μm |
| Measurement form error (plane) | 15 μm RMS |
| Equivalent scanning speed | 50,000 pts/s |
| Mounting | Magnetised coupling |
| Sensor type | 1/1.8" CMOS sensor |
| Projector type | Fixed sinusoidal filtering grating |
| Illumination | A wavelength of 450 nm blue LED |
| Operating modes | 3D Surface point capture 2D Vision measurement |
| Probe head | REVO-2 only |
| Rack port compatibility | VPCP |
| Change rack | MRS2 recommended |
| Software compatibility | UCCsuite 5.6 onwards MODUS 1.11 onwards |
| Integration | I++ DME protocol |
| Weight | 530 g |
| Operating temperature range | +10 °C to +40 °C |
| Metrology specification range | 20 °C ± 2 °C |
| Storage temp range | -25 ˚C to +70 ˚C |
| Operating humidity | 0% to 80% (non-condensing) |
| Calibration artefact | FA10 |
| Output | Point cloud data file (.xyz) |
For more info, visit www.p65warnings.ca.gov.


