13th Apr 2017
Micrometer: Its Working Principle, Parts, Use and Precautions
Micrometer: Its Working Principle, Parts, Use and Precautions
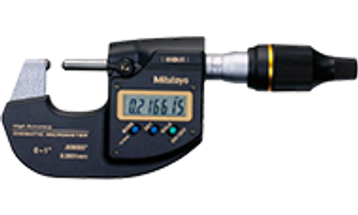
Micrometers are some of the most popular tools for identifying precise measurements in industrial settings and laboratories. Professionals reach for these instruments when they need to guarantee accuracy at small increments.
In factories, they’re often used to measure the size of machining parts and workpieces to ensure that components are the right size and fit together properly. Meanwhile, in manufacturing, they are frequently utilized to confirm that products are consistently made at the correct size and tolerance.
In fact, micrometers are available in a wide range of types and sizes, which makes them ideal for diverse applications and settings. They can be manual or automatic, digital or analog, and they can display imperial units or metric units.
What is a Micrometer?
A micrometer is an instrument used to gather measurements that require greater precision than a caliper can achieve. However, they boast superior precision because they can only measure a very small distance, so they aren’t ideal for determining the dimensions of large objects.
Different Types of Micrometers
In addition to digital micrometers and mechanical micrometers, there are different types based on their applications. The three most common uses include measuring internal bore diameters, the external dimensions of objects (such as shafts and holes), and determining average wear on rolling surfaces, such as gears or ball bearings.
Angular Micrometer
These determine the angle between two planes.
Blade Micrometer
These measure the narrow groove of an o-ring.
Ball Micrometer
These measure the distance between a hole and the edge of a surface; the wall thickness in a tube; and any instance in which one anvil must be placed against a rounded surface.
Bore Gage Micrometer
A Bore Gage measures the internal diameter of a hole, cylinder, or similar surface.
Depth Micrometer
These tools measure solid height.
Outside Micrometer
These measure external diameter.
Pitch-Diameter Micrometer (Thread Micrometer)
These are used to measure the pitch diameter of screw threads.
Tube Micrometer
These are another type that is used to determine the thickness of a tube.
How Do Micrometers Work?
Fortunately, reading measurements on one these tools is not a difficult task. With proper use and precautions, these devices provide accurate readings that ensure quality products are manufactured every time.
They’re typically calibrated in increments called threads per inch (TPI) which represent a distance measured by screwing one turn into the barrel. The most common metric caliper is 100 TPI, with 50 TPI also being common among some industries.
Principle of Operation
The basic principle of operation of a micrometer is as follows:
- The amount of axial movement of a screw that is made accurately can be measured by the amount of rotational movement of it.
- This is because the pitch of the screw is constant.
- The measurement made due to the rotational movement is some amplified form of the actual axial movement of the screw.
Micrometer Parts and Uses
A micrometer typically features eight parts: the frame, the anvil, the sleeves (or barrel), the lock nut (or thimble lock), the screw, the spindle, the thimble, and the ratchet stop.
Frame
The frame is the C-shaped body that holds the anvil and the barrel together. This frame is heavy and thick which makes it difficult to strain under mechanical and thermal stresses.
Anvil
The anvil is the part that rests on one side of the frame. The spindle moves towards the anvil in order to hold the object and take the measurement.
Sleeves/Barrel
The sleeves, or barrel, is the stationary cylindrical component that the frame holds on the other side of the anvil.
Lock Nut/Thimble Lock
The lock nut, or thimble lock, is the lever that’s used to tighten the movement of the spindle so that it doesn’t move while taking the measurement.
Screw
The screw is the main component on which these measuring devices function.
Spindle
The spindle is the cylindrical component which moves when you rotate the thimble. This touches the object which is to be measured and holds it tight.
Thimble
The thimble is the component which is turned by thumbs and which makes the spindle movement.
Ratchet Stop
The ratchet stop is at the end of the instrument and is responsible for ensuring that only an allowable pressure is applied to an object.
Care and Proper Use of a Micrometer
Before you rotate the thimble or the ratchet knob, unlock the locking lever. Make sure to clean the measuring faces with the help of a clean cloth before you begin taking measurements.
As you begin measuring, start rotating the ratchet knob (not the thimble). The ratchet knob will ensure you don’t overtighten the thimble, as that will not only give an erroneous reading but can damage the instrument too.
The horizontal line on the sleeve should be aligned to zero when the micrometer function is at its minimum reading. In case it does not happen, the instrument must be calibrated. For calibration, each device comes with a half-moon adjusting wrench.
Remember to use the thimble lock while the micrometer is still holding the object. If you do not do this, the spindle might move a little while taking the reading or taking the object off from the micrometer. It’s also advisable that you don’t keep the instrument exposed to the sun for long.
Measure with Micrometers from Penn Tool Co.
Micrometers are used in almost all manufacturing industries. They can also be mounted on the bedways of the lathe, or similar machine tools, to make the measurements accurately and easily.
Fortunately, if you’re on the market for a reliable micrometer, we’ve got you covered at Penn Tool Co. From Fowler Universal to Mitutoyo Micrometers, we have the high quality brands you’ve come to trust and love. For more information for maintaining your micrometers, reach out to our team today.

